For some time now, I have been thinking of printing a trebuchet. On Youtube you see massive trebuchets capable of hurling a flaming piano (!) to a distance of 200 meters, or trailer-based versions used in pumpkin-throwing contests. This sort of machinery is clearly beyond my MiniFactories and even the Print-Rite model I was handed the other week, but a small one should be within reason.
As always I first tried an unstable one before hitting on the right design. The first version seemed fine in Blender, and I was thinking of creating a system with many separate parts to maximize size. The first version looks like this in Blender:

And I thought all was well with it. I then laid out the parts in a printable configuration that used the maximum area available, The base has been split into two because that was necessary for the biggest available footprint, and was not printed with the moving parts, but as two separate print runs. Also, the blue vertical parts were doubled. The yellow swing arm is in two parts, but before printing, I edited the swing arm to be one piece. Now that I try to remember why I did it in two parts… I can’t remember.

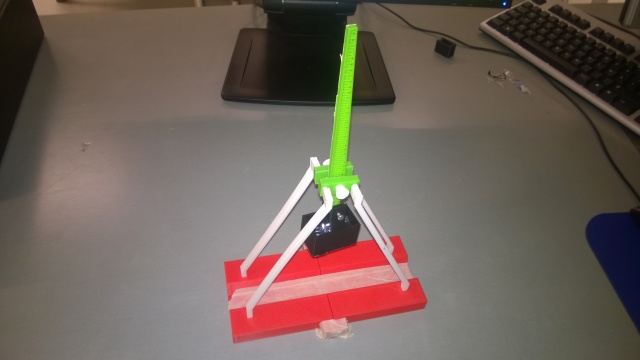
It was easy to get these parts printed, and the jobs only took about 1 ½ hours each. A frantic session of assembly ensued, and I only had to sand down a little on the main axle to get everything to fit together (note that the image above is missing the small axle that holds the bucket in place). And when I had it all together, it looks like this:

Spindly is not the word. The whole contraption is held together by the main axle which binds the green rectangle-shaped leg mounts together, which sounded like a good idea at the time. It is also bound with painter’s tape, because I wanted to be able to disassemble it if needed, and thought to use hot glue for final assembly.
But the system is so lightweight as a whole, and has such dimensional leeway available, that when I loaded the bucket and tested the swing action, the trebuchet would shake and gyrate so much it’d be admirable for a Copacabana salsa queen. It would not survive a launch with payload. Back to the drawing board.
My next version would have to be built on a solid frame to which only the main axle would be attached. It’d be about as big as you can have on the MiniFactory, and therefore I would first model it in Blender, then export and run through RepetierHost, and then see how big it would be if I let Repetier scale it to the max. I will give a detailed description of the modeling process, but now I will show you how it looked in Blender after I was through with it:

This version also reduces the number of parts. There are the swing arm, two axles, two pairs of bushings, and the counterweight bucket as well as the the frame. The frame is one print run (4.5 hours) and the moving parts another (2.5 hours). The good part about this is that the bushings hold the swing arm in place longitudinally, whereas the previous edition tended to shake in all directions at one go. This is the print layout for the moving parts:

When actually printed, and cleaned of the brim I used, the set looks like this:

The frame is built on its own and looks like this when it is on the print table. Note the size of the frame as it is on the table, scaled to the max (147 mm x 147 mm x 122 mm).

So, four hours or so later the frame was done, and the moving parts were run on another printer for 2.5 hours. I am actually very happy with the way it turned out – this is really sturdy.

What remains to be done is the sling assembly. In trebuchets, the payload is put into a soft pouch of sorts and it is bound to the swing arm with two strings that are tied to the ends of the pouch. One string is then attached to the swing arm permanently, but at the end of the other one is tied a loop. The loop is then stuck to the little red tab you see at the end of the swing arm. When the trebuchet is launched, the payload will first swing backwards, and when the payload passes the tip of the swing arm, the loop flies loose from the tab, thus releasing the payload.

I am still figuring out what material the pouch should be, and what kind of payload I should use. That will be shown in a later post, but the next post will be the design of the trebuchet in Blender, because it features extensive use of the wonderful 3D cursor feature of Blender. It can be a little hard to understand, but once you master it, you can’t work wthout it. Stay tuned for part II.
![]()

0 thoughts on “Trebuchet, or counterweight catapult, part I”