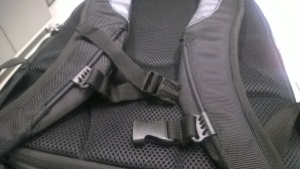
I don’t know about you, but I am one to get irritated with stuff that hangs out in the wrong places. A good example is the chest strap of the computer backpack: I never use it, but I don’t want to cut it off either and harm company property. Instead, I made a quick mesh in Blender and printed it out on the Minifactory, with the net result of straps no longer hanging around causing me to lose hair even further.
Here’s the starting situation:

And this is the finished, improved situation:

Let’s have a look at the fixing clip.
The design of the clip is simple in the utmost. It is merely a 20 mm tall, 20 mm wide and 15 mm deep symmetrical piece of ABS plastic, designed in Blender in 5 minutes and printed on the MiniFactory in about an hour.
I started with a plane that was 20 x 15 units in Blender. Remember that in Blenderspace, there’s no need to set the units to any real world (or Meatspace) units unless you want to.

Then it is easiest to add two loop cuts and scale them along the Y axis so as to get them separated symmetrically (I also added one to form the base of the clip to the left):

Add one more loop cut to start forming the sharp hook of the clip. I also deleted the two faces in the middle:
To get the hooks of the clip, it is easiest to select the two vertices at the inside of the U, and scale in while extruding. This sounds demanding, but it merely creates two more vertices and then brings them close to each other as you can see in this image:

Then just add the edge between the tip of the hook and the newly created vertices. This enables you to create a face between the edges that form the hook. If you wish, you can now dissolve the edges inside the mesh, essentially creating an N-gon instead of a set of triangles and rectangles, but it really does not matter.

All that remains now is to select the entire structure and extrude up 2 units:


And as you can see, we have the basic form there nicely. All that remains is to add a bevel to the outside corners of the mesh, otherwise the final print will not feel nice to the touch – it will be almost sharp. This is done by selecting the edges you want to bevel and hitting Ctrl+B, then dragging the mouse:

This is a nice mesh that can be exported for the printer. It is manifold, ie. it has no holes in it and no loose edges or vertices (in fact it only has 42 vertices) so you need not test it if you don’t want to. I have come to the conclusion, however, that it is a good idea always to pass the exported mesh via NetFabb just to make sure.
And then we can start the printer and RepetierHost, the control software.

So now you can still edit the clip for its external measures, but getting the slot of the hook to close is not possible. For that, you need to re-import the STL to Blender and edit to suit, and then re-export. After you are satisfied with the measurements of the clip, go to the Slicer tab and let Slic3r or Cura take care of building the printable code.

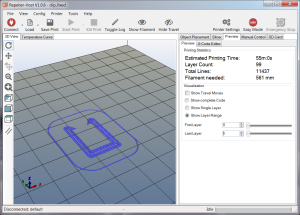
This is the first layer of 99, and the build time is around 55 minutes, but this is an estimate only. The line around the actual clip is called the skirt, and you can use that to build a wall against drafts of cold air that can affect printing. I don’t usually use it, but I updated Repetier and forgot to turn it off. After 99 layers you have the finished print, and the filament usage is 561 millimeters. This means that there is not a great amount of money to be made selling just the ABS filament, since it comes in rolls of almost 400 meters, or 40,000 millimeters.
This animated GIF shows how the piece is built layer by layer:

The final product looks like this:

So, in essence – this trivial example is written to show that you can identify needs in your own life, use free tools (Blender or Google Sketchup) to create a virtual answer for that need, and then go to a public library to print the piece. There are 3D printers in Finnish libraries that only charge you for the filament used. So, let’s get started!
![]()
